How to Filter Patients by Appointment
You can Filter patients by appointment on HelloHealth and besides all patients linked to the chosen provider being shown by default, there are more filters that you can use to further choose which patients you would like to see.
This is where filtering patients by appointment comes to play.
There are three main types of appointments filter:
- Appointment Date
- Appointment Status
- Appointment Type
Filter patients by Appointment Date
You can view patients by filtering them based on their appointment dates.
To do this you should follow these steps:
Step 1
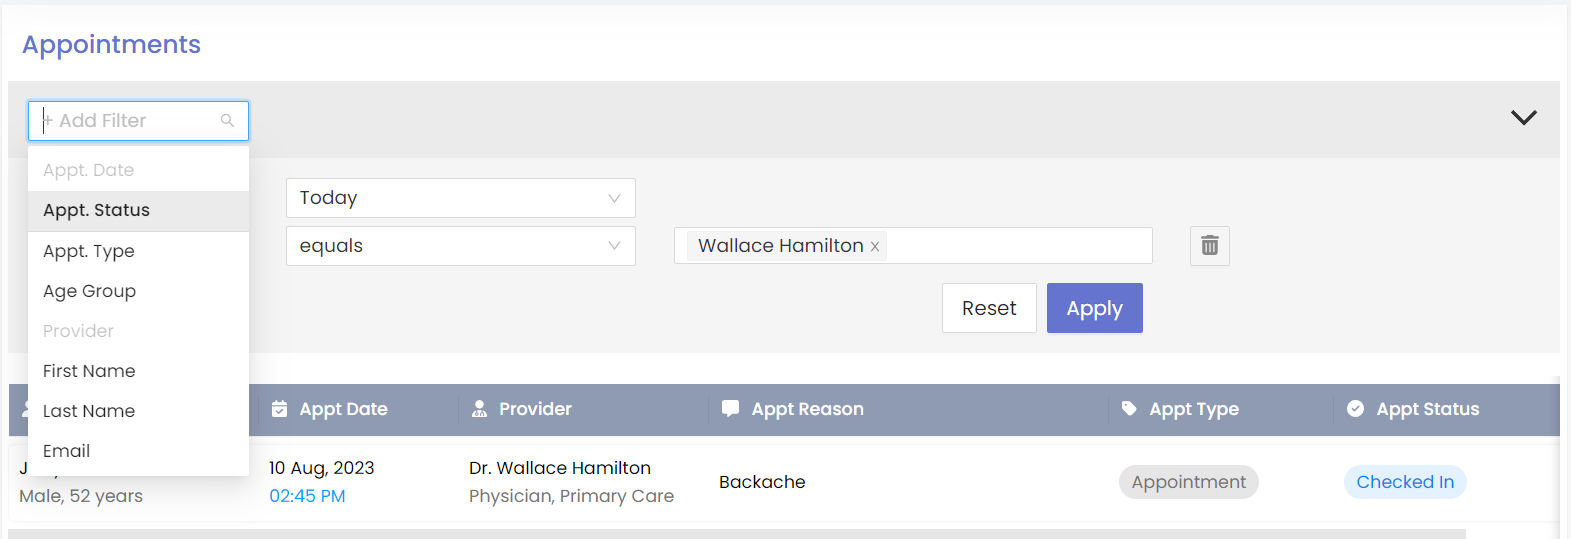
Click on the “Add filter” drop-down at the top left corner of the screen.
Step 2
Select “Appt.Date”.
Step 3
After selecting “Appt.Date”, a ticked box will appear, and in the same line next to “Appt.Date”, another drop-down box will appear.
Step 4
Click on the drop-down box and you will be presented with eight (8) filter options in the drop-down: A) Equals
- B) Between
- C) Custom
- D) Yesterday
- E) Today
- F) Tomorrow
- G) Previous Week
- H) Current Week
If you select any of these options; Yesterday, Today, Previous Week or Current Week, you can skip step 5.
Step 5
After selecting any of the options (besides Yesterday, Today, Previous Week, and Current Week), you will see a date range pick pop-up. Here you can select the date range you want.
Step 6
Choose the dates and click the blue “Apply” button under the drop-down. From here you will see patients who have appointments on the dates you have selected.
Filter patients by Appointment Status
You can view patients by filtering them based on their appointment Status. This helps you see only the patients that you want to see.
To do this you should follow these steps:
Step 1
Click on the “Add filter” drop-down at the top left corner of the screen.
Step 2
Select “Appt.Status”.
Step 3
After selecting “Appt.Status”, a ticked box will appear and in the same line next to “Appt.Status”, another drop-down box will appear.
Step 4
Click on the drop-down box and select “equals” and next to it another drop-down box will appear.
Step 5
When you click on the drop-down box, you will see a list of filters pop-up. Here you can choose one or more appointment status:
- A) In Room
- B) Checked in
- C) Confirmed
- D) Cancelled
- E) Wait listed
- F) Reschedule
- G) Booked
- H) Scheduled
Step 6
Choose the dates and click the blue “Apply” button under the drop-down. From here you will see patients who have the appointment status(es) you have selected.
Filter patients by Appointment Type
You can view patients by filtering them based on their appointment Type. This helps you see only the patients that have the appointment type that you want to see.
To do this you should follow these steps:
Step 1
Click on the “Add filter” drop-down at the top left corner of the screen.
Step 2
Select “Appt.Type”.
Step 3
After selecting “Appt.Type”, a ticked box will appear and in the same line next to “Appt.Type”, another drop-down box will appear.
Step 4
Click on the drop-down box and select “equals” and next to it another drop-down box will appear.
Step 5
When you click on the drop-down box, you will see a list of Appointment Types pop-up. Here you can choose one or more Appointment Type.
Note: Appointment types are set by you.
Step 6
Choose the provider(s) and click the blue “Apply” button under the drop-down. From here you will see patients who have the Appointment Type(s) you have selected.