HelloHealth allows you to customize your appointment settings based on the preference that your practice has. Customizing appointments will impact the activities your patients can perform in HelloHealth.
How to customize appointment settings
By customizing appointment settings you are setting the rules that your patients will follow when making appointments from the HelloHealth Patient Portal.
You can allow all or some patients to book appointments themselves, or block them from making appointments from the portal.
How to customize appointment schedules
Appointment schedule configuration is part of appointment settings, here you can define which patients can make an appointment.
This happens for two types of patients:
- New Patients – You can enable or disable the ability for your established patients to make their appointments.
- Existing Patients – You can enable or disable the ability for your new patients to make their appointments.
Furthermore, there are additional settings for setting your appointment configurations.
Configuring Self-schedule
These settings predetermine the appointment schedules that patients will see when booking an appointment, with details such as:
- The type of patient who can book an appointment, new or established patient;
- The appointment type;
- Location;
- Available slot and appointment length.
These are the steps to follow when configuring the self-schedule:
Step 1
From the appointment settings, click the icon alongside ‘Configure self-schedule’, which will open a new page.
Step 2
Here you can see a list of any appointment schedules you have made, with the ability to edit and delete the ones you already have.

If you have none set or want to create a new one, click “Add new schedule.”
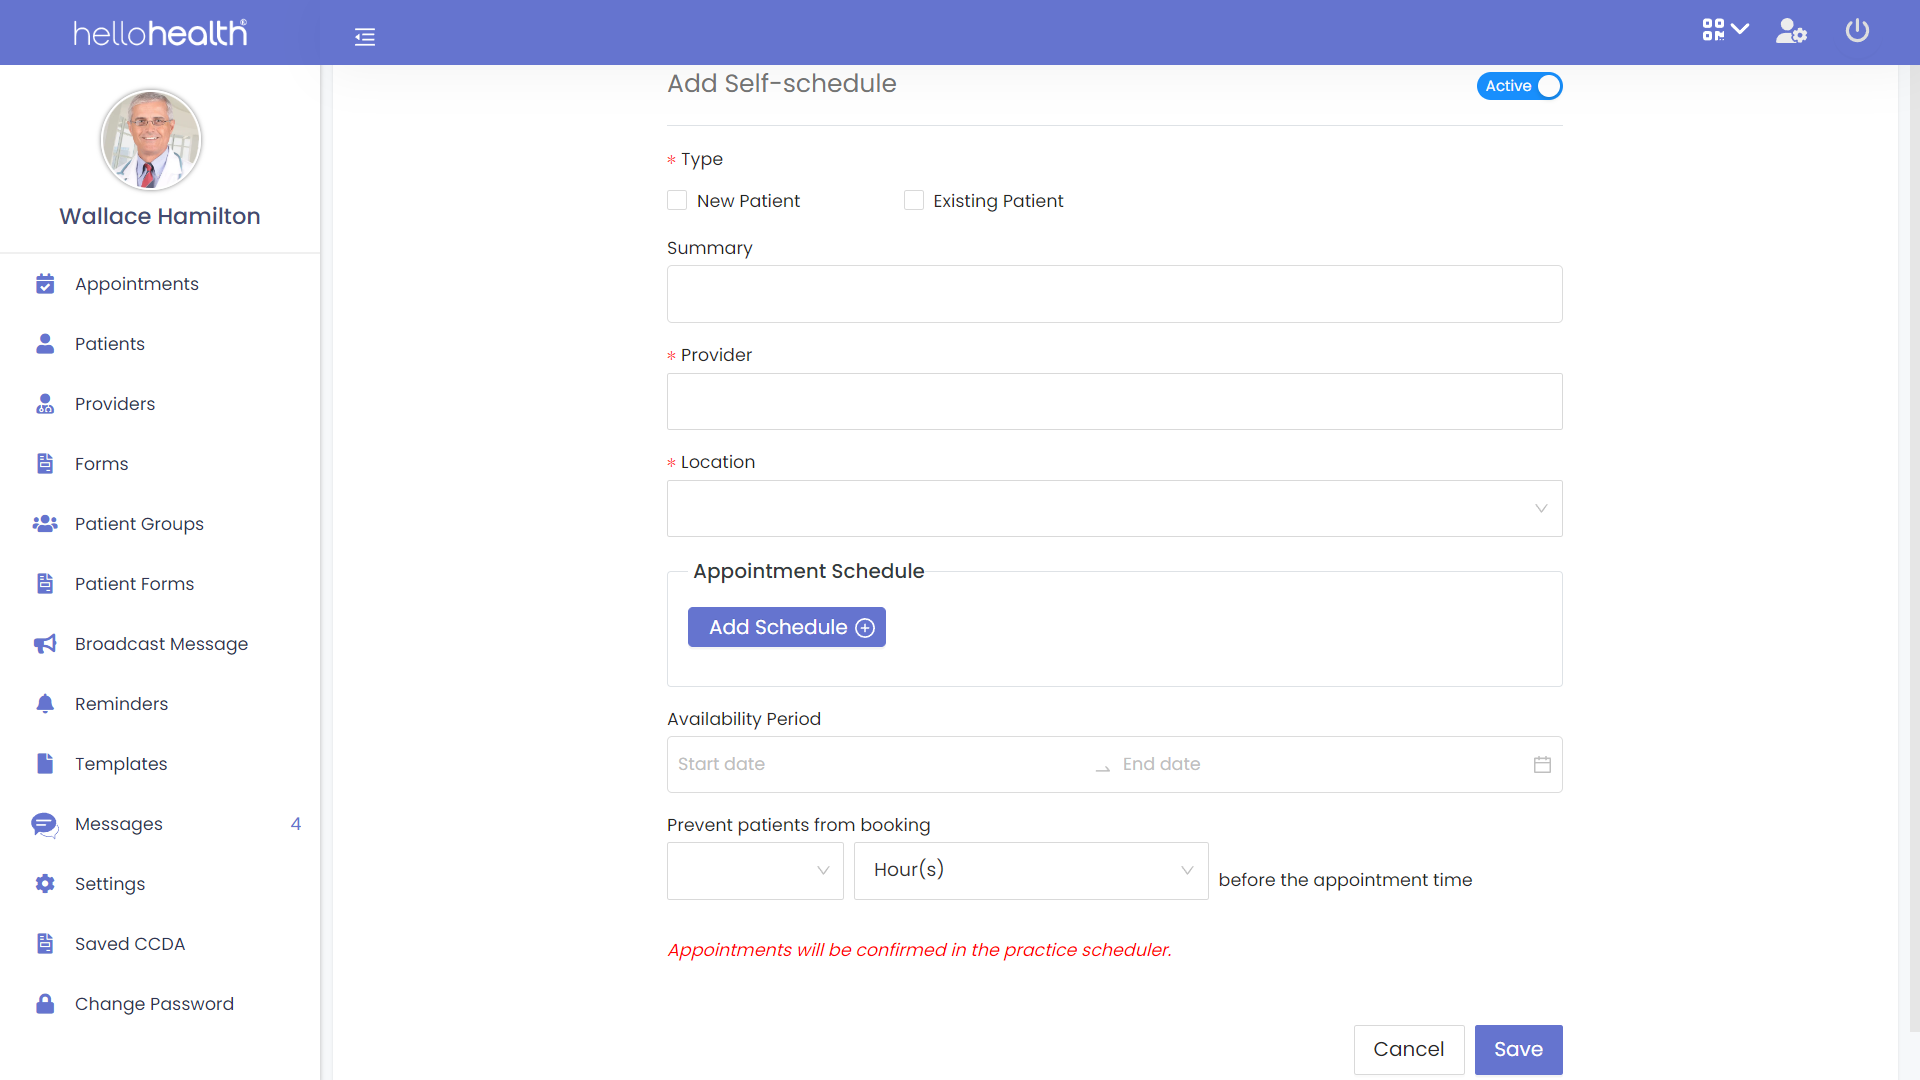
Step 3
By default, the schedule will be active on the top right of the screen. Select the type of patient this schedule will be for, and the summary of the schedule (Eg, Appointment Schedule 1).
Step 4
Select the Provider (you can select more than one), followed by the location.
Step 5
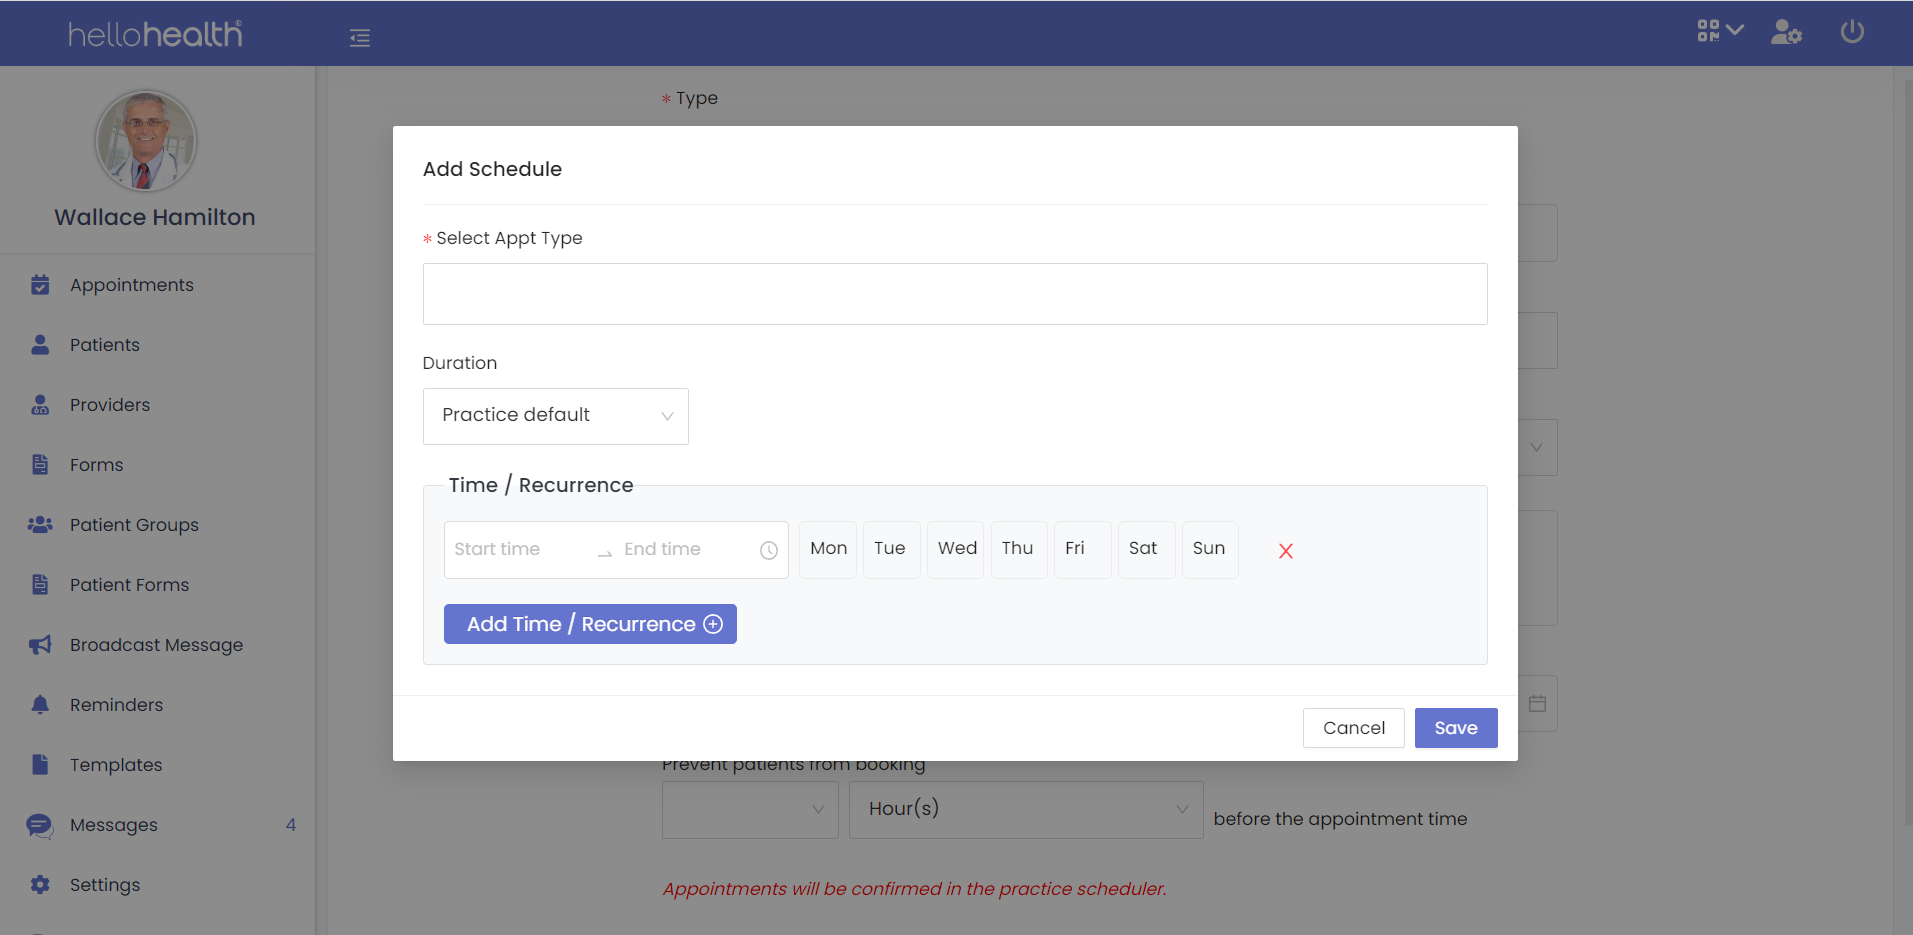
To add an appointment schedule, click “Add Schedule” under “Appointment Schedule”. Here you can customize the appointment details such as the appointment type and allocate available days and times that patients can book these appointments. You can add as many different schedules as you prefer. Once complete, click on “Save”.
Step 6
Select the availability period of the appointment schedules, this is how long the schedule will be effective. Set the details on how soon a patient can book an appointment before they attend it. This can be done by customizing the details on the “Prevent patients from booking” feature.
Once complete, save the configuration so your patients can see the available appointment types when making an appointment.