How to Create An Appointment Recall
Recalls are created in PracticeSuite as reminders for the practice and are made in HelloHealth to be sent to patients.
HelloHealth will send recall reminders with a ‘Pending’ status in PracticeSuite to patients.
To create an appointment recall in HelloHealth, follow the following steps:
Step 1
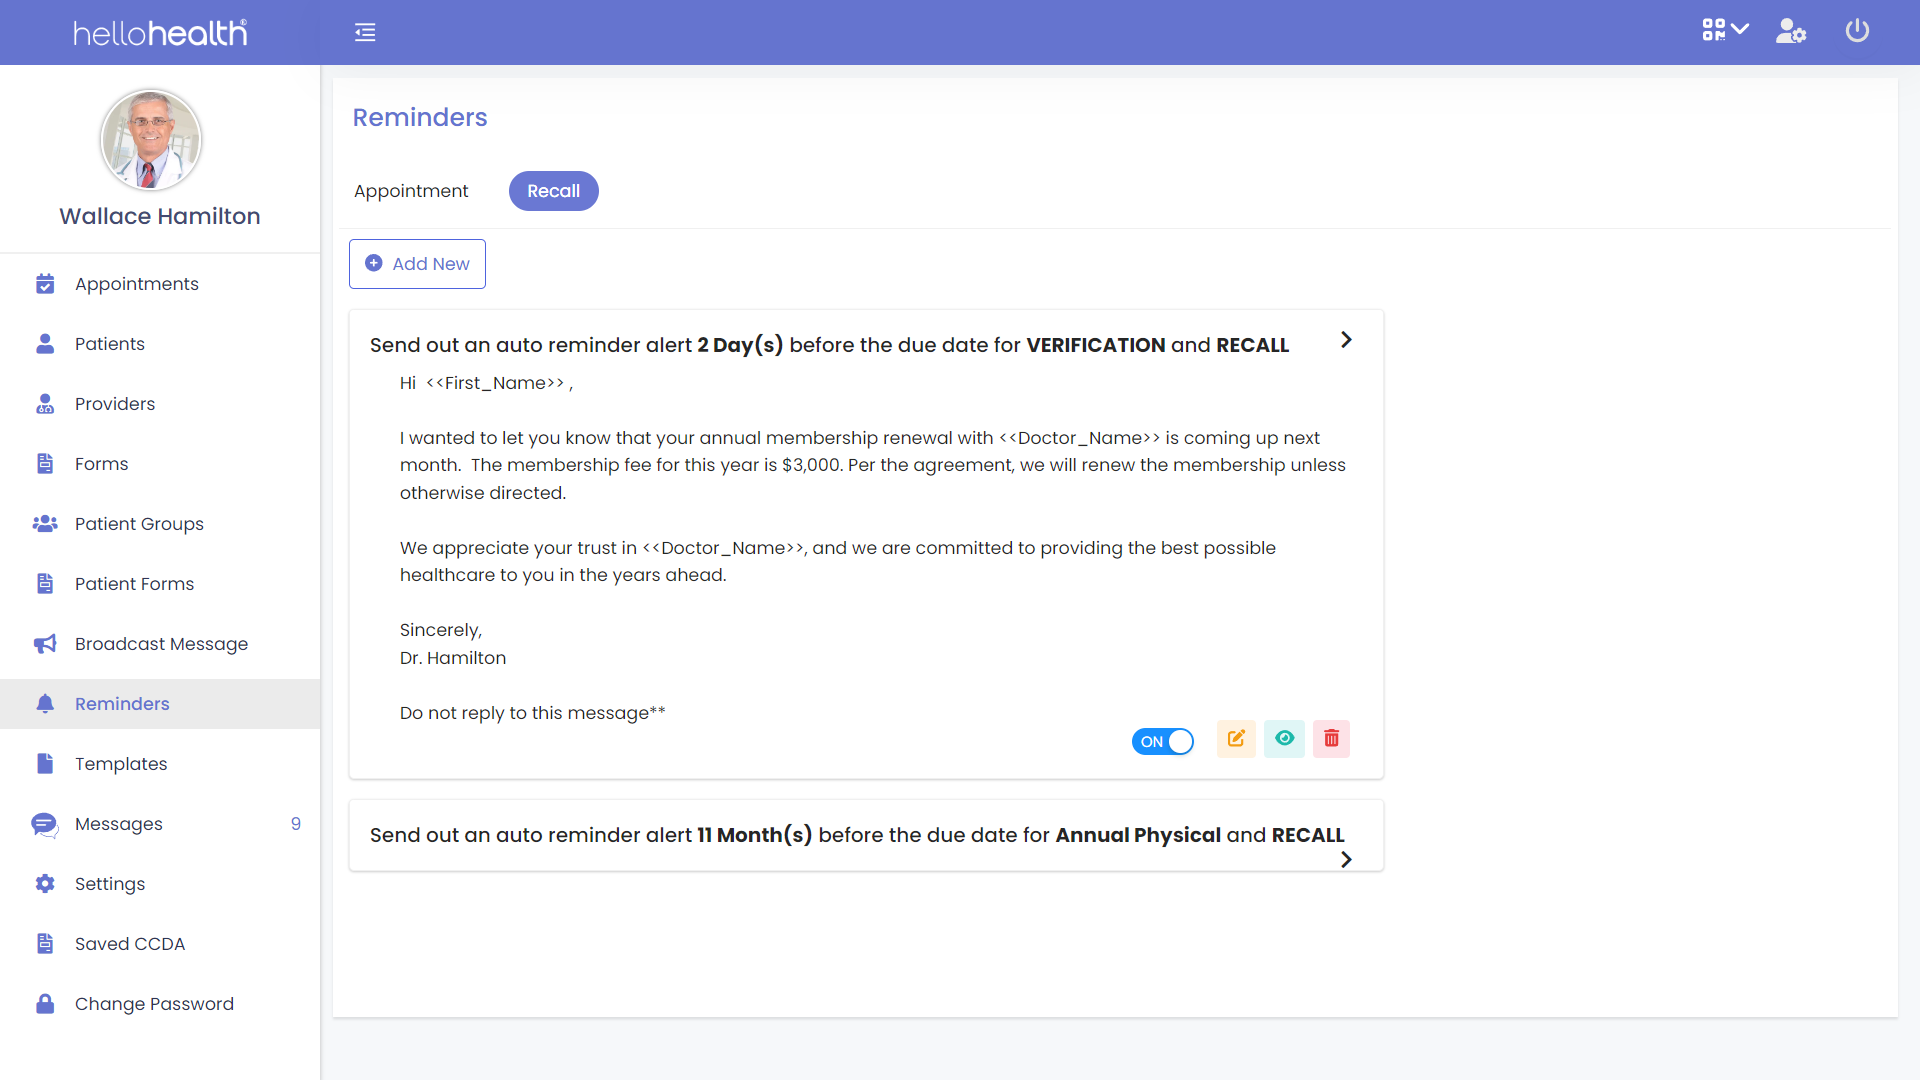
On the ‘Recall’ screen, to create an appointment recall, click on ‘Add New’.
Step 2
After you click the ‘Add New’ button, a new page will appear, allowing you to begin setting up your automatic reminder.
First, under the ‘Send out an auto alert’, click on the ‘Select Option’ drop-down to see all the different options available for you.
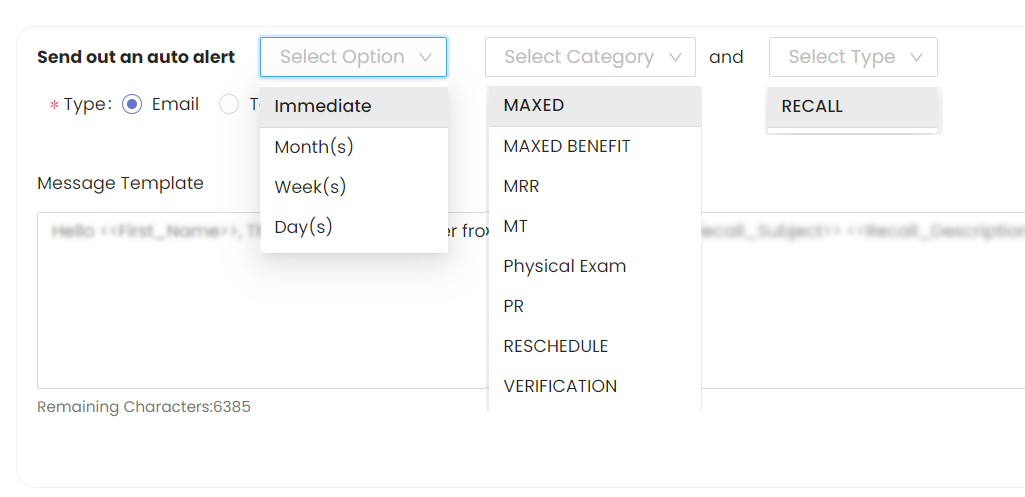
The Category will have various recall options that you can select from, as set in PracticeSuite.
- Immediate – This system automatically sends a reminder after a recall has been set.
- Months –This system automatically sends a recall up to 12 months before the recall is due.
- Weeks – This system automatically sends a recall up to five (5) weeks before a recall is due.
- Days – This system automatically sends a recall a few days before the recall is due.
Step 3
Select which method you would like for patients to receive the recall. There are three ways in which you can send an automatic recall: through email, text, or both.
You will have 6500 characters for email text, and 500 characters for text reminders, and both the reminders combined.
Step 4
Click ‘Save’ to save the Reminder or ‘Cancel’ to delete the configuration.
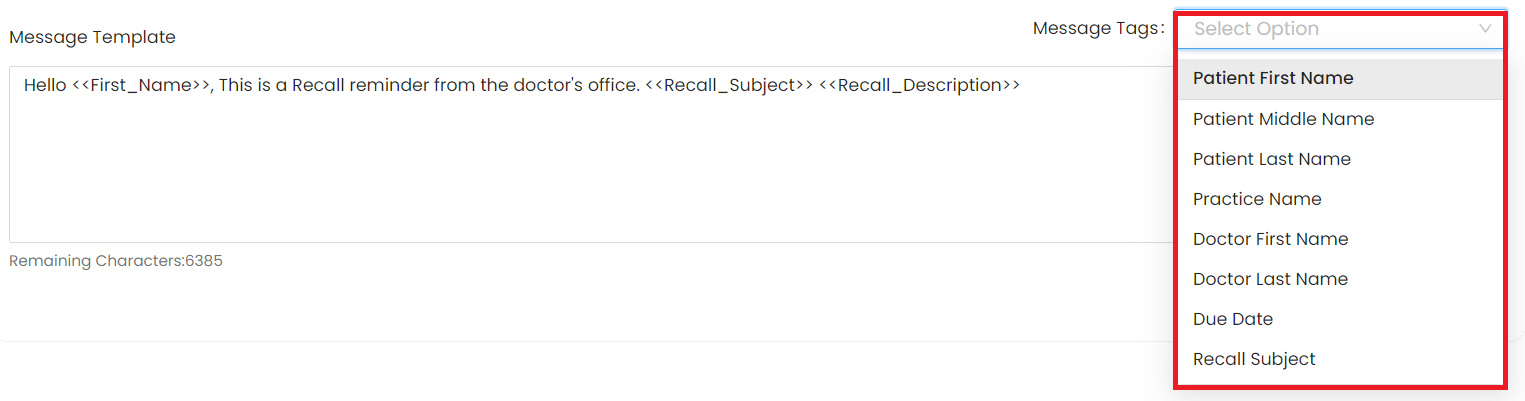
Message Tags
Message tags look like this <<First_Name>>, they are used to customize your messages further. When used in a message a message tag will personalize the message and the <<First_Name>> tag, when received will show the Patient’s First Name. See the drop-down to see what the other tags will include.
Once you create the Recall, you can perform various actions using these icons:
– Edit the Reminder – Delete the Reminder. – Preview the Reminder
Learn how to create appointment reminders.